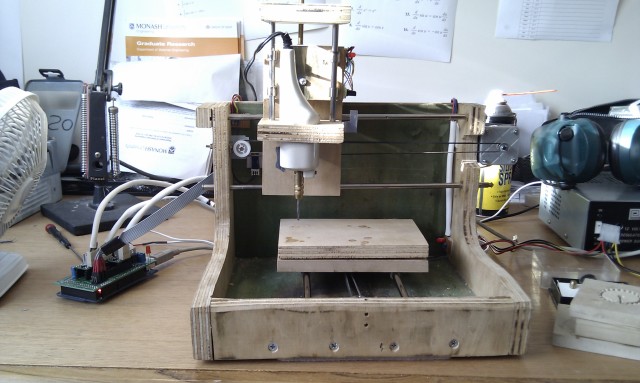
My Mantis inspired repstrap/CNC mill is finally up and running. All the mechanical parts were scavenged used for the repstrap were from old printers. The total cost ended up being around $140AUD. This was all spent on the electronics and includes shipping. Not a single ball bearing was used in the construction of this repstrap.
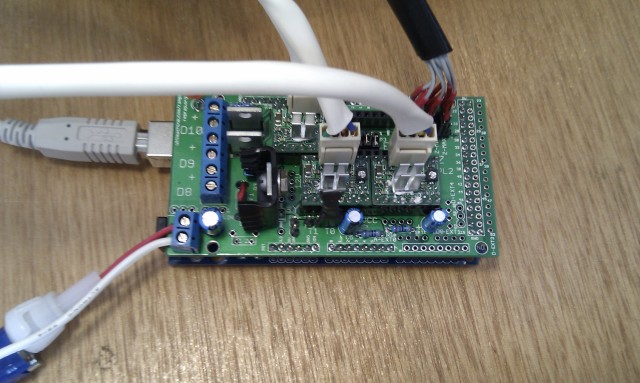
 Its 3 three salvaged stepper motors are controlled by an Arduino Mega clone (running 5D firmware) which then commands the 3 Pololu stepper drives mounted using a RAMPS. Unlike the original Mantis CNC its belt driven on the X and Y axis, but still threaded rod driven for the Z. The Mill is an old 10,000RPM engraving tool which was mounted unmodified.
I didnt have any of the correct long female headers (on order from here) which normally go onto a shield above, so instead used normal 2.54mm breakaway male headers.
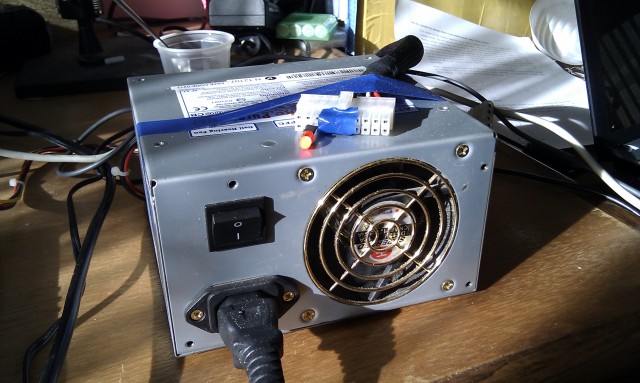
Powering the RAMPS is a quality thermaltake ATX power supply. This is rated to supply18A at12V and 40A at 5V. More than enough for all my needs, heated bed included. The indicator LED is just bridged across the 3.5v line (with a resistor) and ground to let me know when its on as its very quite when little current is being draw.
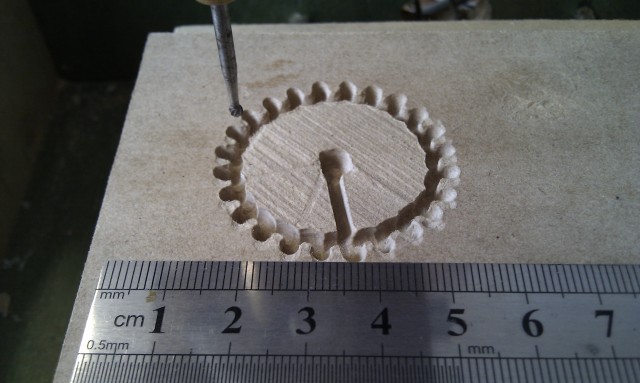
 The image below was produced using the reprap host software and milling as if I was extruding. The z axis direction was reversed so that each layer was removed from the surface downwards.
Soon after producing this I discovered that Skeinforge had a milling function and moved onto using this instead. Below is a video of spur gear being produced using gcode generated in Skeinforge. It skipped a tooth soon after starting so I didn’t let this run until completion.
Unfortunately, due to the health risks associated with MDF dust, I wont be using this repstrap for milling anything but PCB’s from now on. It will instead be used as a true repstrap once my Wades geared extruder arrives in the coming week. Then to start printing Mendel parts.


Would it be possible to use a decommissioned vacuum cleaner and attach it’s nozzle in the vicinity of your drill? That could be a cheap and easy solution to the sawdust problem.
If the vacuum cleaner was of good quality then it should remove most of the dust from the work area. However the engraving tool I’m currently using is a little under powered and so a good quality part would take upwards of 3 hours to complete. I dont think my old vacuum cleaner would last long using it for those lengths of time. I may look into this option if I come across a bitter milling tool or vacuum cleaner.
Thanks for the suggestion.
How are you planning to do your milling of pcb’s with skeinforge? Afaik, skeinforge only accepts stl, so you’d have to make your own g-code and hope the firmware accepts it.
I have a setup very similar to yours: an enlarged mantis, controlled by an arduino mega, our own (ultimaker) shield and replicator-G feeding it g-code. I am very interested in your skeinforge profle for milling, as skeinforge still looks a bit repulsive to me.
Thus far I have made my gcode with pycam, which seems to generate acceptable gcode except for a complex and misunderstood G4 (dwell). Deskproto (commercial) seems to produce acceptable gcode too.
I am planning to mill the PCB’s with gcode created from cad.py and run in the reprap host software. I have yet to test this but. Another option im looking into is using the same process used to create the gcode for ‘plotting‘ but instead applying it to milling. I’m having a few problems with that method at the moment.
As for skeinforge, it does look a little overwhelming at first glance. However, once you switch it to milling mode the vast majority of options are removed making making it quite easy to use. A few key settings are:
– Layer thickness (under the chop tab) as this adjusts the depth each new layer is milled at.
– Feed rate (under feed tab) as this adjusts the speed the end mill moves at.
– The cutting lift over layer step (Lift tab). This adjusts the height the tool lifts to move from one track to another.
– Loop inner outset over Perimeter width ratio ( Mill tab). This was the most confusing setting. By adjusting these ratios (which are relative to your layer thickness) you change the distance between each milled line. A smaller end mill will need a lines closer together and so a smaller ratio..i think. I’m still not 100% sure.
Hi
I try the Same i have an proxxon cnc Mill (usovo) but the Controller sucks.
so have you been successful? Or any hint for me?
Thx
Thomas
Very cool 🙂
Pingback: Projet Mantis: Une CNC DIY à moins de 150 euros | LabSud
hi man
very good job, what is the firmware that are using milling, which is the software used.
Thanks
what firmware are you using?